AlgoLaser Do it yourself Kit Laser Engraver Cutter: Establish Your own private High-Precision Engraving Device for United states of america Makers
Are you interested in to go into laser engraving but discover pre-assembled equipment far too pricey? Are you presently a maker who enjoys making your individual equipment? The
On this in depth information, We're going to examine every little thing you have to know with regards to the AlgoLaser Do it yourself Package Laser Engraver Cutter. You might find out about the assembly procedure, essential attributes like the 32-bit motherboard and WiFi Management, suitable products, software package selections, and why this Do it yourself kit is getting acceptance amid American makers. By the tip, you'll be all set to purchase this package and begin making your own engraved products and solutions.
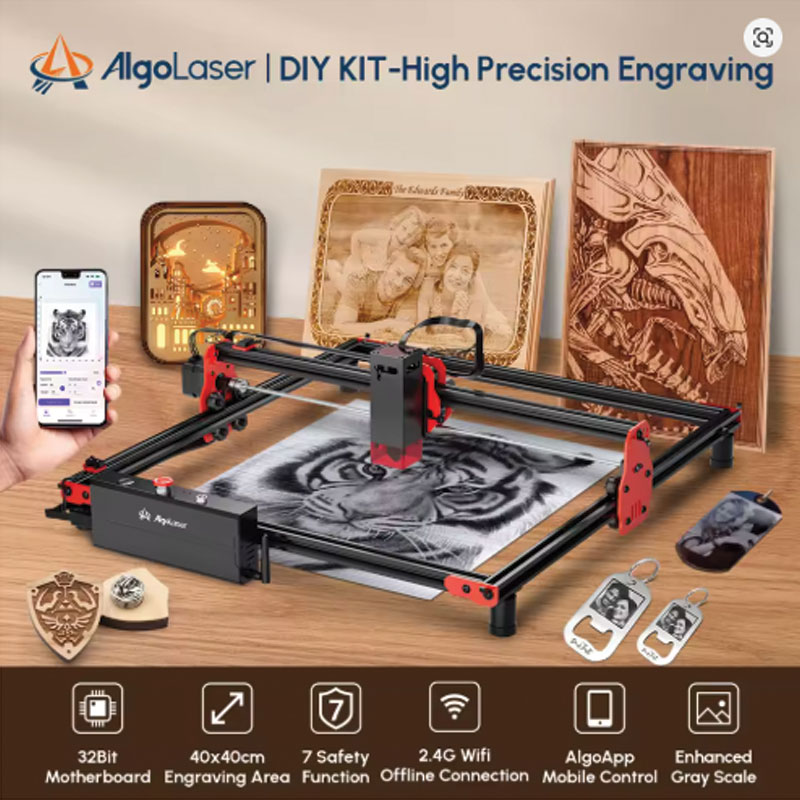 Features | 32-little bit, WiFi, cell Regulate | 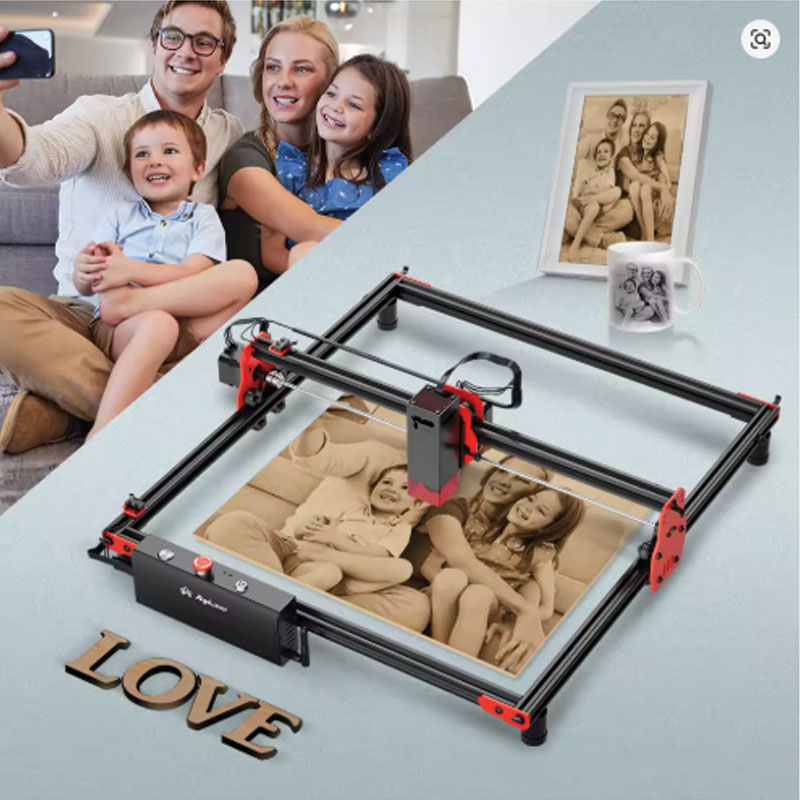 Assembled | 40x40cm perform place | 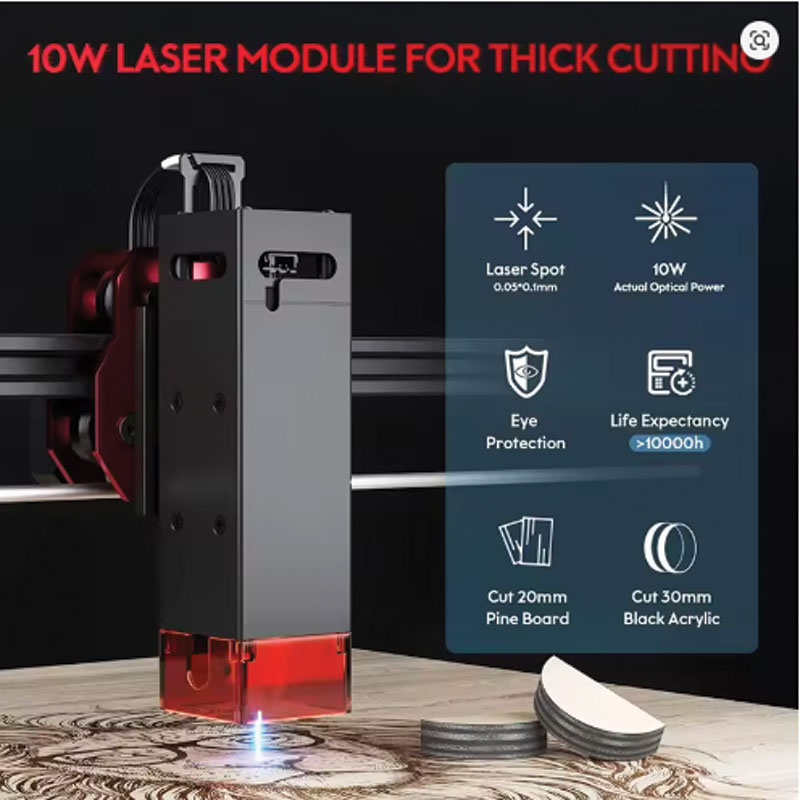 Components | All areas bundled |
 Motherboard | 32-bit controller | 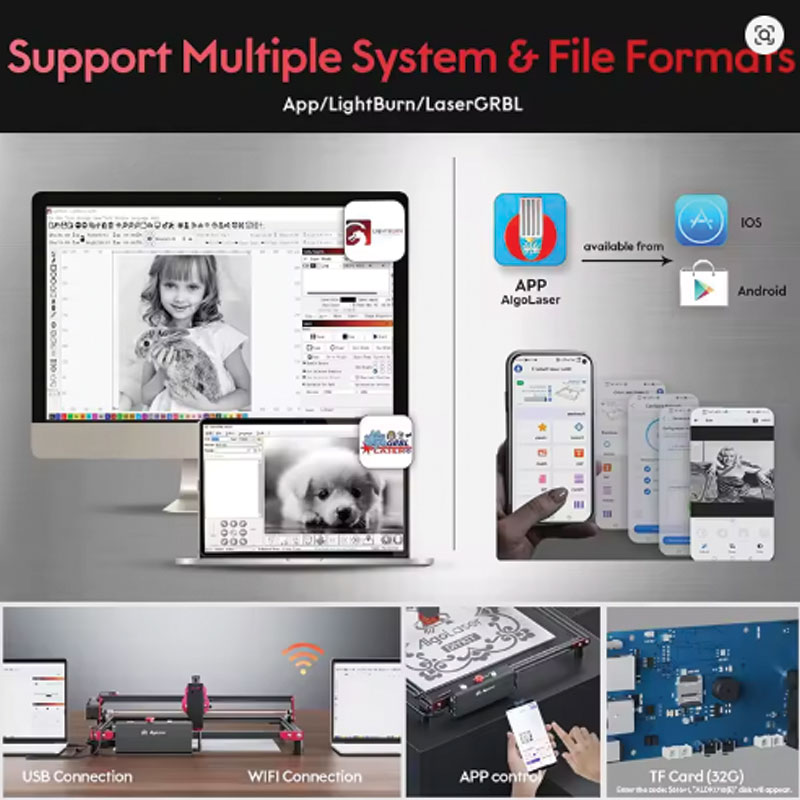 Laser Module | Significant precision | 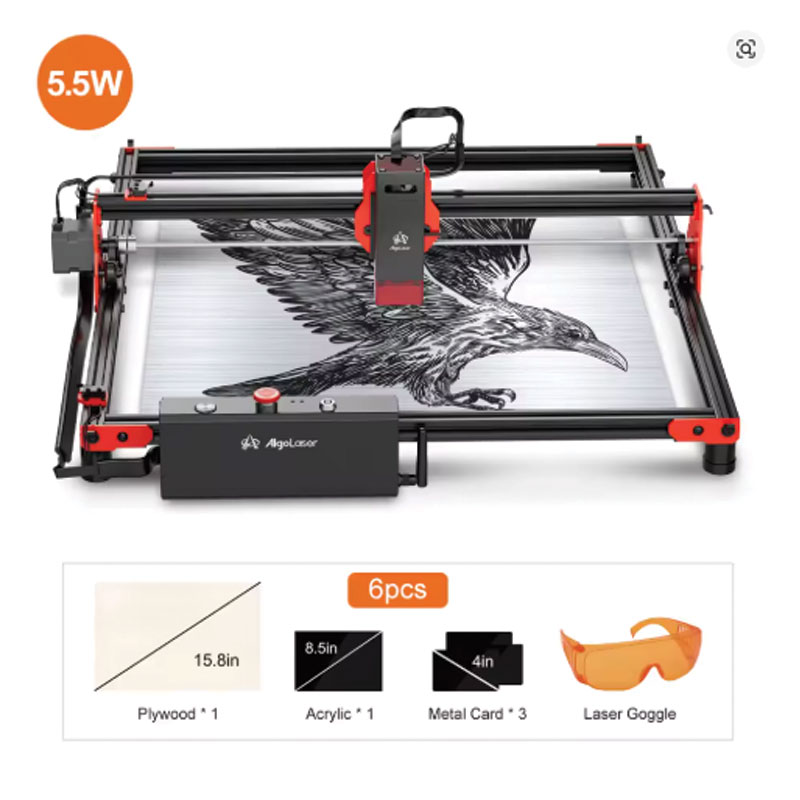 Frame | Sturdy aluminum |
 Engraving Sample | Grayscale support | 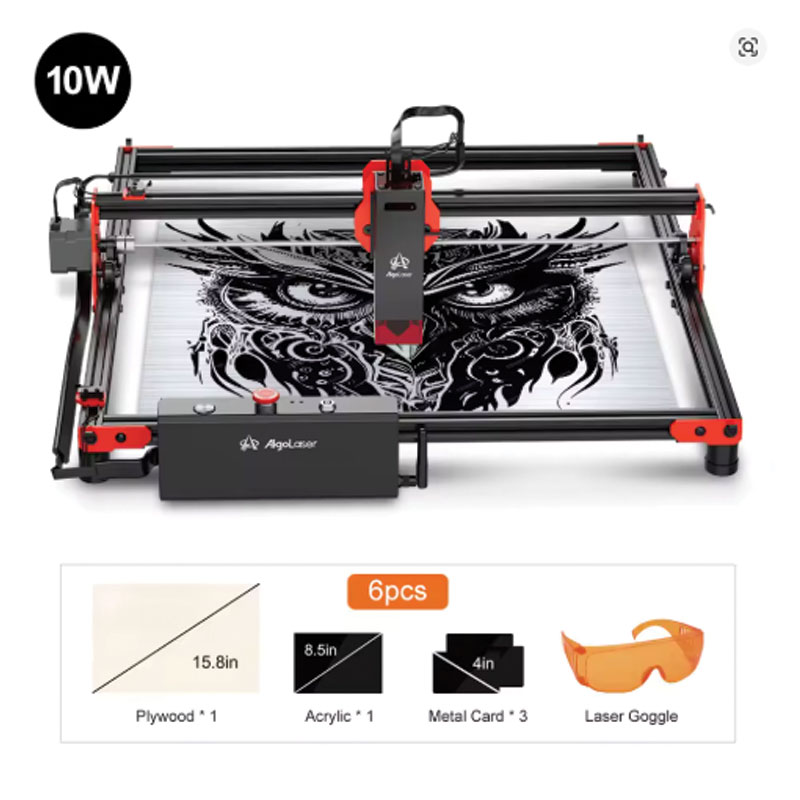 Mobile App | AlgoApp Command | 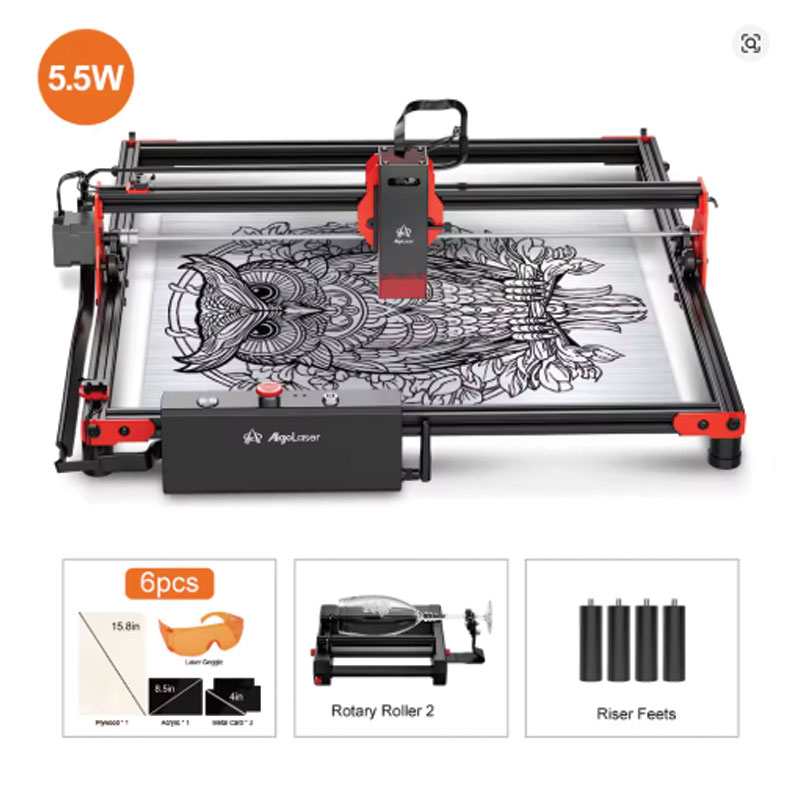 Complete Setup | Wanting to engrave |
H2: What Is the AlgoLaser DIY Package Laser Engraver Cutter? A Complete Overview
The
The resulting equipment contains a generous 40cm x 40cm (about 15.7 x fifteen.7 inches) engraving location. It supports 2.4G WiFi for wireless Management, offline operation through USB or SD card, and cellular Handle with the AlgoApp. The 32-bit motherboard permits grayscale engraving, where by unique ability ranges develop shading and Image-like final results. For United states smaller entrepreneurs, hobbyists, and educators, this Do-it-yourself kit offers a Price-helpful strategy to enter the laser engraving current market.
H3: Crucial Characteristics of your AlgoLaser DIY Package Laser Engraver Cutter for United states of america Prospects
Substantial sufficient for signs, plaques, coasters, cell phone circumstances, and compact product or service batches. Fits on most workbenches.
Strong processing enables more rapidly engraving speeds, smoother motion, and grayscale aid. Upgraded from older 8-little bit boards.
Ship engraving data files wirelessly from the cellular phone or tablet using the AlgoApp. No Laptop or computer wanted for fundamental Careers.
Preserve files for the motherboard or an SD card. Operate engraving Work opportunities with no a computer related. Perfect for workshop environments.
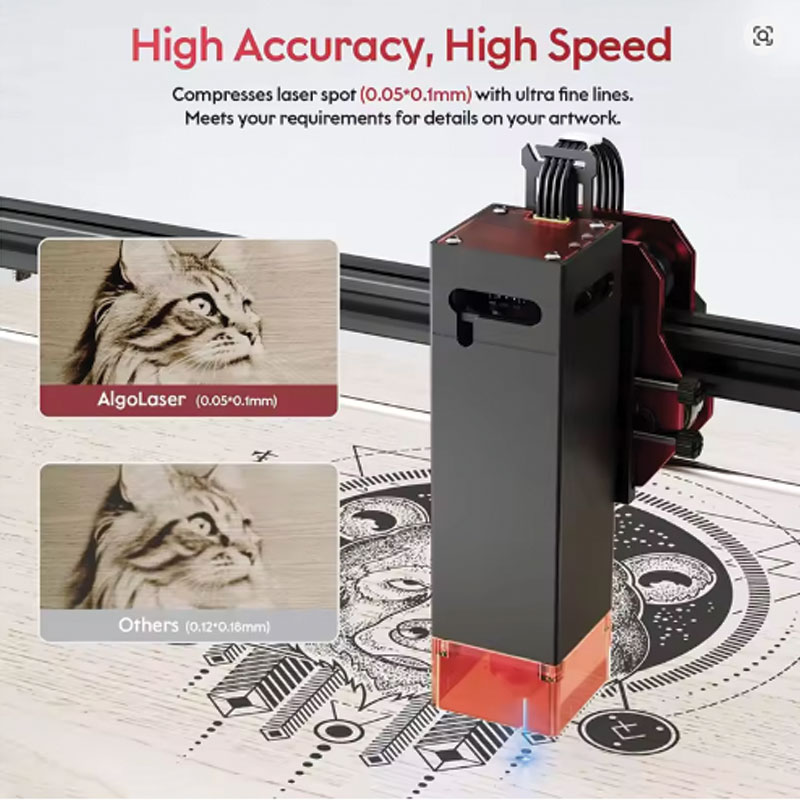
Make photo-like engravings with different shades. The 32-little bit board modulates laser power according to impression brightness.
Incorporates crisis end, flame detection, tilt defense, and also other protection features. Reassurance for USA customers.
H4: Comprehending the 32-Bit Motherboard Advantage
Quite a few reduced-cost laser engravers use eight-bit motherboards. These older controllers have restricted processing ability, leading to jerky motion, slower speeds, and no grayscale aid. The
H2: The best way to Assemble and Use the AlgoLaser Do-it-yourself Package Laser Engraver Cutter
Assembling the AlgoLaser DIY Kit Laser Engraver Cutter will take roughly 2-four hrs, according to your experience. Stick to these rules.
H3: Assembly Guidelines
Inventory components: Lay out all elements. The package consists of aluminum extrusions, linear rails, belts, pulleys, wheels, motor mounts, laser module, motherboard, ability source, wiring harness, fasteners, and equipment. Create the frame: Assemble the base and gantry utilizing the aluminum extrusions. Utilize the integrated T-nuts and bolts. Ensure the body is square and degree. Put in linear movement components: Connect the linear rails, belts, and wheels. Change belt tension so there is not any slack but not extremely restricted. Mount the motors: Put in the stepper motors on the X and Y axes. Hook up the motor cables to the motherboard. Set up the laser module: Mount the laser module to the laser head carrier. Adjust the focus mechanism. Wire the electronics: Hook up the facility source for the motherboard. Join the laser module, limit switches, supporters, and also other components. Follow the wiring diagram very carefully.- Set up basic safety functions: Connect the emergency prevent button, flame sensor, and tilt sensor.
- Calibrate and examination: Power to the device. Utilize the control software to house the axes and take a look at motion. Change belt stress and wheel alignment as wanted.
AlgoLaser presents an in depth assembly manual with images and movies. Acquire your time and effort. Double-check every link. If you get caught, on the internet communities and AlgoLaser help may also help.
H3: Application and Regulate Selections
The
AlgoApp (Cell): Obtain the cost-free AlgoApp for iOS or Android. Hook up with the engraver by way of WiFi. Choose pictures out of your gallery, alter settings, and begin engraving. Great for speedy Careers and inexperienced persons. - LightBurn (Desktop): The business typical for laser engraving. LightBurn runs on Windows, Mac, and Linux. It offers advanced options like impression tracing, vector editing, and content libraries. Join by means of USB or WiFi.
LaserGRBL (Desktop - Totally free): A no cost option for Windows consumers. Works properly with GRBL-centered controllers much like the AlgoLaser motherboard. Excellent for essential engraving and reducing.Offline Management: Help you save G-code files towards the motherboard's inside storage or an SD card. Make use of the onboard controls to get started on Employment without having a computer or mobile phone connected.
H3: Compatible Elements and Programs
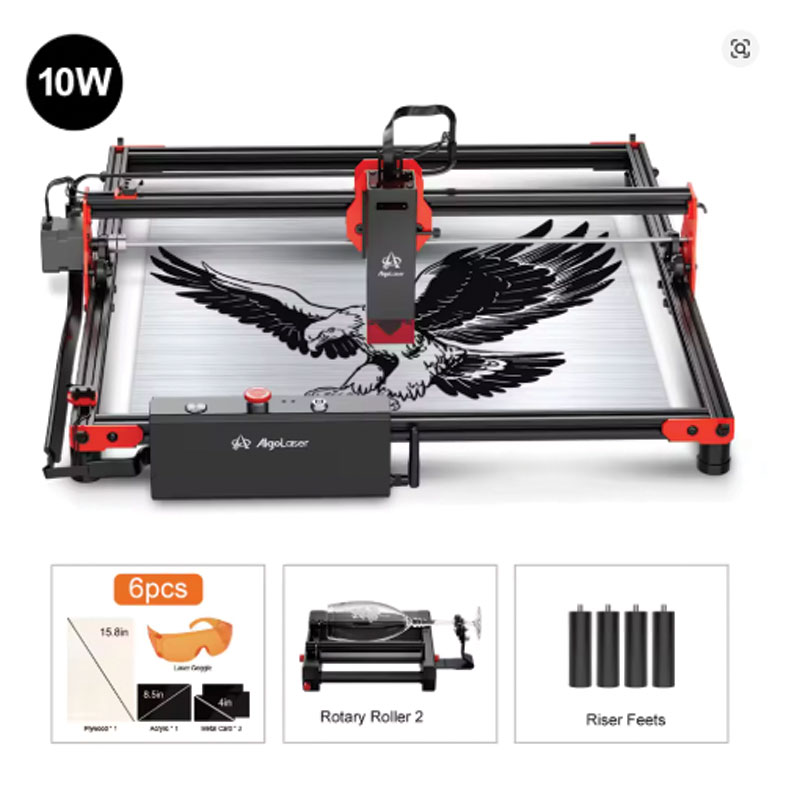
The provided laser module (typically 5W or 10W diode laser) functions on several elements:
Wood: Plywood, basswood, balsa, MDF, hardwood. Perfect for symptoms, coasters, puzzles, and decorations. Leather: Actual and fake leather-based for wallets, keychains, and baggage. Acrylic: Dark acrylic (light-weight acrylic requires different laser wavelength). Glass: By using a coating or marking spray. Stone: Slate coasters, river rocks for Image engraving. - Paper and cardstock: Greeting cards, Invites, stencils.
Bamboo and cork: Eco-helpful items. Anodized aluminum: Eliminates anodized coating to expose bare metal.
Be aware: This diode laser cannot Slice or engrave bare metals (besides with marking sprays). For metallic engraving, think about the AlgoLaser 1064nm infrared module.
H4: Knowledge the seven Security Capabilities
The
Crisis Halt Button: Immediately stops all motion and turns off the laser. Flame Detection Sensor: Detects fire during operation and immediately stops the laser. Tilt Safety: Shuts down the laser In the event the machine is tilted (stops fires if knocked more than). - Laser Shutter: Blocks the laser beam when not in use.
Overheat Security: Screens laser module temperature and minimizes ability if as well hot.Limit Switches: Stops the gantry from crashing to the finishes of your body. Enclosure Interlock (optional): In case you build or acquire an enclosure, you could add a swap that disables the laser in the event the doorway is open up.
For USA people, these protection characteristics provide satisfaction, specifically for workshops with kids or pets present.
H2: Who Should Buy the AlgoLaser DIY Package Laser Engraver Cutter?
The
H3: For Hobbyists and Makers
Should you get pleasure from making matters, the assembly approach is an element with the exciting. You will learn how laser engravers function, creating you improved at troubleshooting and upgrading your device later. The 40x40cm work space is perfect for hobby assignments: wooden indicators, engraved cellphone circumstances, leather wallets, and custom items. United states of america makers take pleasure in the worth and customization likely of a DIY kit more than a pre-assembled machine.
H3: For Small Business people Starting an Engraving Company
Starting get more info off Quote the Price a laser engraving company can be expensive. Pre-assembled machines Price $800-$2000 to get a equivalent work spot. The
H3: For Educators and Makerspaces
Teaching pupils about laser engraving is simpler when they understand how the device operates. The Do it yourself kit is an excellent educational Device. College students can assemble the machine, learning about mechanics, electronics, and program. Then they are able to utilize it for assignments. The protection attributes (flame sensor, unexpected emergency end) make it well suited for classroom environments. United states high colleges, colleges, and makerspaces are adopting the AlgoLaser DIY kit for STEM instruction.
H3: For Anyone on the Spending budget
Not everyone can pay for a $one thousand laser engraver. The
H2: Specs on the AlgoLaser Do-it-yourself Package Laser Engraver Cutter
Listed here are the complete complex aspects for the
more info
H2: Often Asked Questions on the AlgoLaser DIY Package Laser Engraver Cutter
H3: How difficult can it be to assemble the AlgoLaser Do it yourself package?
Assembly is average. If you have crafted furnishings from IKEA or assembled a 3D printer package, you will discover this manageable. The package includes thorough Guidance with shots. On line video clip guides also are offered. Be expecting to spend 2-4 several hours. Essentially the most time-consuming pieces are belt tensioning and wiring. If you will get caught, the AlgoLaser Local community on Facebook and Reddit is useful. For United states of america customers that are affected individual and detail-oriented, assembly is usually a rewarding knowledge.
H3: Can I use LightBurn With all the AlgoLaser Do it yourself package?
Yes. LightBurn is completely appropriate with the 32-bit GRBL motherboard. Connect through USB or WiFi. Configure LightBurn for your GRBL device with the proper function area (400x400mm). LightBurn unlocks State-of-the-art functions like graphic tracing, materials libraries, and digital camera alignment. A lot of United states users favor LightBurn for its Skilled abilities. A cost-free thirty-day demo is out there, then a license rate (a single-time buy).
H3: Does the AlgoLaser DIY package have a laser protection enclosure?
No. The Do it yourself package contains the machine factors although not an entire enclosure. AlgoLaser presents an optional enclosure accessory, or you are able to build your personal. A correct enclosure is very advised, particularly if you have got little ones, pets, or Others from the workspace. The enclosure incorporates laser reflections, includes fumes (with ventilation), and helps prevent accidental publicity. At minimum amount, use laser basic safety glasses rated for 445nm wavelength.
H3: Exactly what is the difference between the 5W and 10W laser module solutions?
The 5W module is ideal for engraving and light chopping (nearly 3mm wood). The 10W module cuts speedier and will Slash nearly five-6mm wood. For United states of america buyers who largely engrave, the 5W is enough. For those who need to Minimize thicker materials or get the job done speedier, the 10W is definitely worth the extra Expense. The two modules use the exact same mounting hardware. You can start While using the 5W and upgrade later on.
H3: Can I upgrade the AlgoLaser DIY package to a bigger get the job done place?
The kit is made for 400x400mm. Having said that, because it uses regular 2020 aluminum extrusions, you could theoretically prolong the body. You would want lengthier extrusions, belts, and cables. This is certainly a sophisticated modification. Most United states buyers uncover 400x400mm adequate for symptoms, phone conditions, coasters, and smaller solutions. If you want a bigger region, look at AlgoLaser's bigger pre-assembled designs.
Video Showcase: AlgoLaser Do it yourself Kit Laser Engraver Cutter Assembly and ProcedureWatch the movie beneath to see the assembly process, cellular application Management, and engraving good quality on the AlgoLaser DIY kit.
|